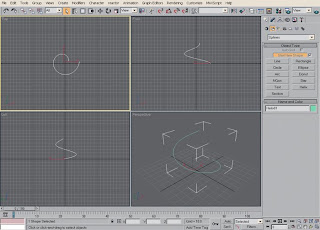
1. To create a Christmas tree we must first create its base which will be made of a Helix and a Circle.
To do that go to a Creation panel: Shapes and create a Helix in a Top view.
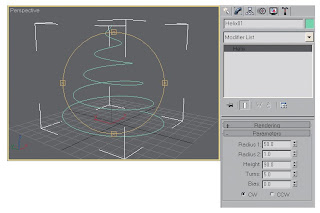
2. In a modify panel change its parameters as shown on the image to get this result. (50,1,90,5)
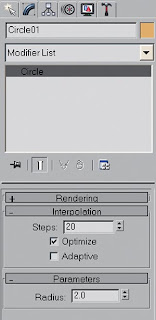
3. Go back to Creation panel: Shapes to create a circle in a front view.
In a modify panel change go to Parameters to change its radius to 2 and its Interpolation Steps to 20 to make it smoother.

4. Change its parameters in status bar also.
Now we're going to put these two together.
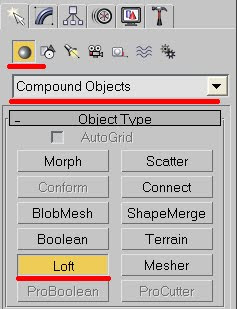
5. Choose Circle; go to Geometry - Compound objects and choose Loft.
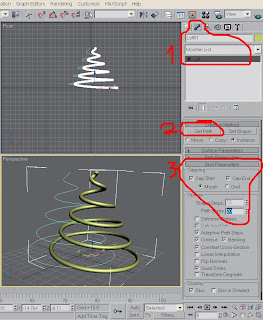
6. Next choose Get path and then – back to choose the helix.
7. You can see that our base is a little bit edgy. To make it smoother choose the tree base again and go to a Modify list. Choose Skin Parameters menu and change Shape steps to 10 and Path steps to 20.
The base for our Christmas tree is ready.You can move Helix and circle aside so they won't make be a distraction.
And now the fun part begins because we're going to add some spikes to it.
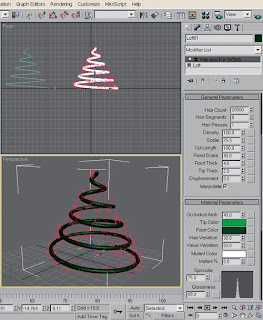
8. Change the base color to dark green.
9. Choose your tree, go to a Modify Panel and choose a Hair and Fur from the modifier list – or press H on your keyboard.
10. On a dropdown menu Choose General parameters and start changing them. You can change the hair number with Count - 20000, its length with Scale - 25, its thickness with its Root - 4 and Tip Thick - 2.
11. To make the tree green go to Material Parameters menu and change a tip color to light green and root color to dark green.
12. Press 8 on your keyboard to change a Background Color to white.
13. Hit F9 to render. It might take some time – so be patient.
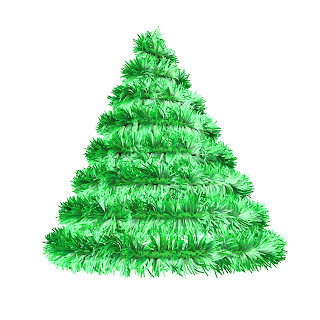
Any changes you wish to make - from Helix and Circle to Hair and fur parameters – you can. Any change will instantly appear.
That’s it for the tree part.
Hope you found this tutorial useful.
If you have any questions regarding this tutorial - don't hesitate to ask here.
9 comments:
very helpful dear.
thank you
Glad you found it helpful.
I always get this Memory Limits may be exceeded when trying to render hair with high poly growth objects. How can i change this ?? I have quite a logic memory on my pc like 2GB ram, should i get a higher end computer or what??
Is there some other way to not keep getting this annoying message? I cannot change colors on my fur/hair
I keep getting the Memory can be exceeding issues when trying to render hair with high poly growth objects. My memory is 2GB !!! How can i get messages like that?
Is there some way to avoid this??
I cannot change colors neither tip or root.
To change a color of the Hair you should go to Material parameters – it's all there. Don’t forget to choose the object first.
As for the PC memory – Hair and fur is a very heavy modifier, so you should be careful there… Do close all other applications while rendering and for preview render only low resolution image.
Thank u very much from the Philippines. glad to see this post Dalia.
on my modifier list there is no loft setting
where can i find it?
omg i have to finish this like today and tomorrow
i dont have enogh time :( :(
what year is your max?
can u please please send it to me i need it asap... if u still have it... lol
email: pink_rose502@hotmail.com
thnax if you can
Princess Lautner, you can find Loft in Create - Geometry - Compound Objects menu - see image in step 5.
Happy holidays!
Thank you bro this was very helpful. Thank you so much.
Post a Comment