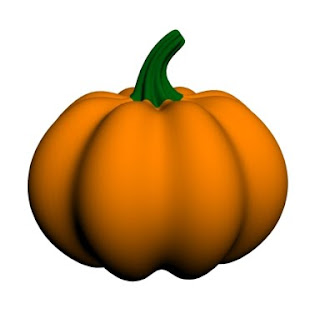
Halloween is coming so it is time to model some pumpkins!
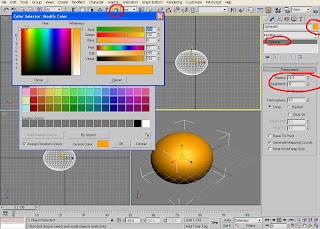
1. To make one you should first create a simple Sphere. In a Modifier panel change its radius to 50 and Segments to 32. Make it a nice orange color (252, 160, 0). You can Scale it a bit, so it doesn’t look like a ball.
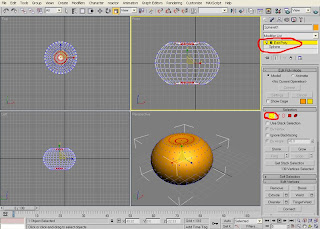
2. Go to a Modifier list and choose Edit Poly: Vetex Sub-Object.
3. In a Front View choose the upper and the bottom vertexes and scale them inside – as shown on the image. Repeat it twice.
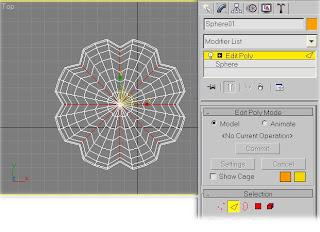
4. Now on the Top View choose every forth Edge and Loop them (ALT+L). Then go to scaling and pull these Edges inside.
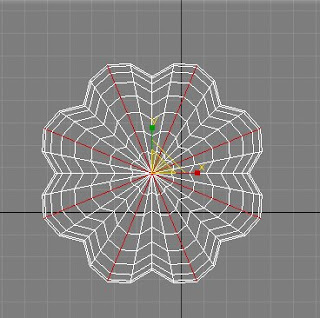
5. Now chose Edges as shown on image and Scale them outside.
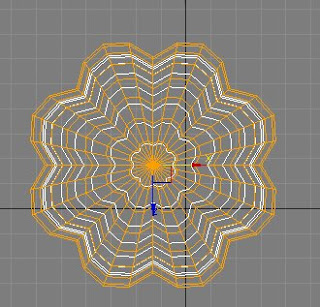
6. Make a copy of this model and scale it to be a bit smaller. Move it aside for a while.
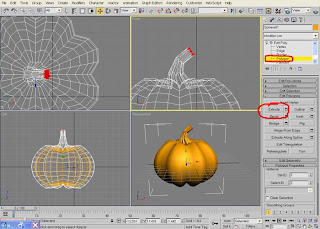
7. Choose upper Polygons of the Bigger form and extrude them up to make a pumpkin steam. If it's too straight, connect Edges and move some Vertexes.
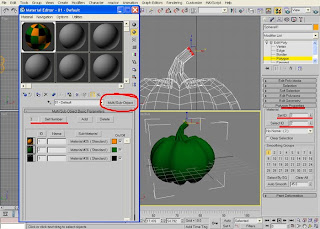
8. Press M on your keyboard and choose an empty slot. In a Material/Map browser choose Multi/Sub-object.
9. Change Set Numbers to 3 since you will use 3 colors – orange (255, 132, 0), green (0, 98, 12) and black (0, 0, 0). You will notice that each color has it's ID - we will use it soon.
10. Apply materials to your pumpkin - orange body and green steam. If there is some mixture in colors go back to Modifier panel and scroll down to Polygon Properties. Choose separately body polygons and set the Material ID's accordingly to the Material settings ID.
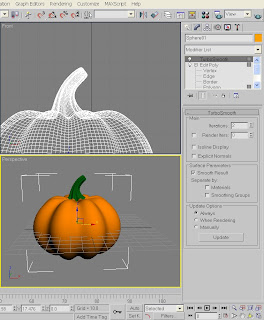
11. In a Modifier panel choose TurboSmooth to make our pumpkin smoother.
12. Change the background to white (8 on Keyboard) and Hit Render (F9).

The Basic pumpkin is ready.
Hope you found this tutorial useful.
If you have any question regarding it - feel free to ask.
2 comments:
I am still learning this program, but one step was a bit confusing. The step after you set the material ID's/Colors (1,2,3). For some reason, it wouldn't allow me to change the colors for each ID (Orange being the pumpkin's body, Green being the stem, etc.). Perhaps you can (for us beginners) go in a little more detail about changing those particular parts of the pumpkin to their appropriate colors? Thanks for the tutorial. The pumpkin looks great now!
DVF
Hi Anonymous.
To answer your question please check steps 9-10, I added some details to it, hope it helps.
Good luck!
Post a Comment