In Part 2 we will be creating a Valentine card itself using the Heart image we created in Part 1 .

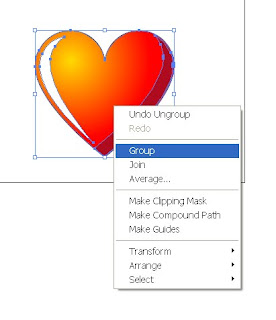
1. Place the heart you created in Part 1 of this tutorial on a new document and group it (Ctrl +A, right click - Group).

2. Create a new layer and copy paste a heart on it. Lock and hide it for now.

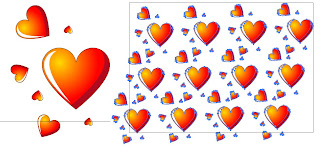
3. Duplicate a visible heart a few times and place and transform it as shown - you don't have to be precise.
4. Choose this group, make it smaller and place in the upper left corner of your document. Duplicate it (Alt + drag) so it fills our working space.

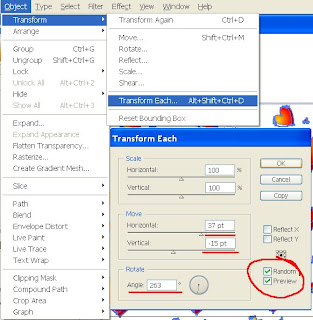
5. Choose all hearts (Ctrl +A) and go to Object – Transform – Transform each.
6. First check Random and Preview so you could see all the changes you're making.
Play with the settings a bit. I suggest you make some manual changes after this step to spread it a little bit more.
7. Add a new layer above this one. Create a rectangle to completely cover the spread hearts. Fill it with bright pink corol(0, 9, 100).

8. Go to Transparency window and choose Screen.

9. Unlock the Heart layer and place it above the others. Duplicate and place as shown – or as you wish.
10. To write a personal greeting press T on your keyboard and start writing. To change size and font go to Type – Size/Font.
That’s it.
Happy Valentine!!!
If you have any question regarding this tutorial - don't hesitate to post it.
2 comments:
u dont know how much this tut has improved my skills...thanks a lot and plis plis kip more flowing...
I am so glad to hear that :)
I promise to publish more of those :)
Post a Comment