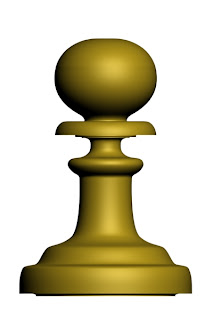
In this tutorial you will learn how to create a chess Pawn.
As usual, you will need a reference image before you start creating anything. You can upload this one or find/create another one.

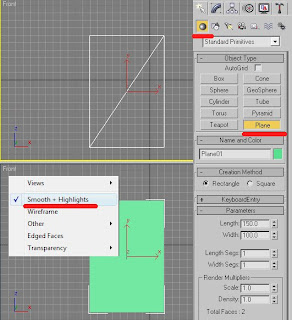
1. On a front view create a 150 x 100 (Generic units) plane. Then right-click the Front View and check Smooth and Highlight. This will allow you to create your pawn easily.

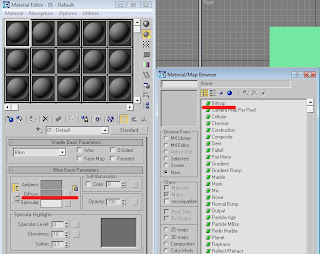
2. Press M and choose an empty slot. Go to Diffuse color, hit the grey square near it and choose a Bitmap to import the reference image. Apply the image to the Plane.

3. On a front view outline only a half of the reference pawn using a Line tool. Close spline when you finish outlining. If the outline is not as accurate as it supposed to choose Vertexes (Modifier menu) and right click your mouse. Click Bezier Corners. Now u can adjust each corner handle separately.

When finished outlining go to interpolation and change to 20 steps to make the line smoother. If you need to add some vertexes, press Refine and hit the line when little white cross appears above it.

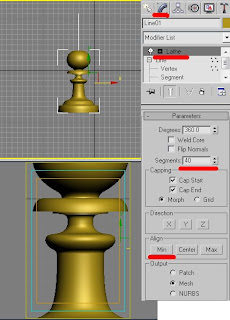
4. When you are pleased with the outline, go to the Modifier menu and choose a Lathe modifier. You will see that your outline became 3 dimensional.
In Parameters press Min button to set the pawn right. Change Segments to 40. Keep smoothing the corners, if needed.
5. Basically, the pawn is ready. Apply an ochre color to it (177,148,26) and that's it.
Notice: Another way to create a Chess pawn is to use a Loft Deformation .
If you have any questions regarding this tutorial, do not hesitate to ask me.
Enjoy,
Dalia
No comments:
Post a Comment