
Today I will show you how to create this stylish mug filled with coffee.
Before you start, make sure you have a proper reference image to base your illustration on. To make your work easier remember to create each object on a separate layer and keep only active layer Unlocked.
Now we can get to work.
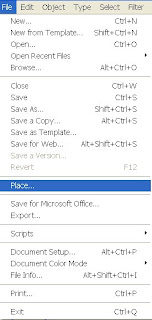
1. Open a new document (Ctrl + N) and choose Portrait orientation for your artboard. Go to File and Place you reference image on the work space and Scale it to fit the margins (Choose – Shift).Close layer and create a new one.
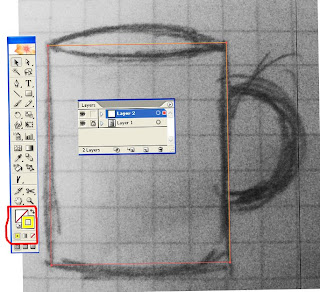
2. On a new layer create the Rectangle (M) that fits the ref. image. Make the Fill color transparent and Stroke color visible on your reference image.
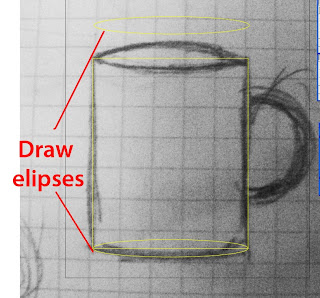
3. On a new layer create a narrow ellipse (L) and place it on the bottom part of the rectangle. Scale it if needed. Copy the Ellipse (Choose + Alt + Drag) and put aside for now.
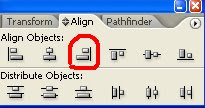
4. Choose both the Rectangle and the bottom Ellipse and alight them (Window - Alight) one to another at their Horizontal alight part.
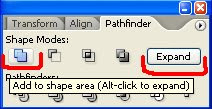
In the same window find Pathfinder menu. When both Rectangle and the Ellipse are still chosen press Add to Shape to make one figure out of two. Now press an Expand buttons to get rid of all unnecessary lines.
5. Take the spare ellipse, move it to a new layer and place it in the upper part of the rectangle.

6. Since the mug has its thickness, create another copy of the ellipse, scale it be a bit smaller but fit to the bigger one. Alight all to a vertical and horizontal center.
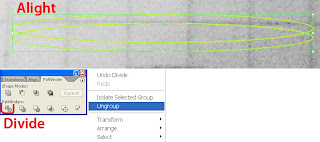
7. Now make two copies of the smaller ellipse and place them above the mug. Alight them to left and put one above the other.
8. While both of the ellipses are still chosen, go to Pathfinder again and choose Divide option. Right click and ungroup the figure. Now all the intersected parts are separate one from another. Choose the middle part and place them in the upper ellipse of the mug. This for will represent the drink itself.
 9. Apply some basic color on your mug so we don’t get lost in all lines. We will change it later, when needed.
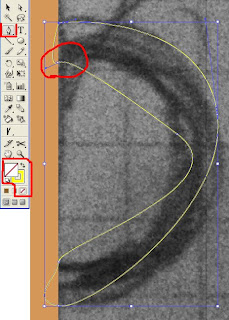
10. Now – to the handle. Create a new layer and change the color fill to None. Using a Pen tool (P) start encircling the handle of the ref. image. To make soft lines remember to drag your mouse a bit after making each anchor point and only then to release it. Close your line by pressing the very first dot. If the form doesn't exactly fit the reference, choose each dot and start moving the handles. To move each handle separately, press Alt.
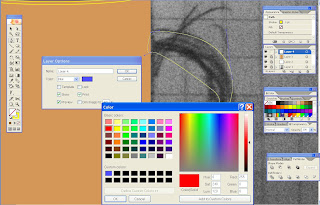 If you have trouble seeing the handles, Double click the active layer and change its color to something more suitable.
 11. At this point you can Lock the layer with reference image and make it invisible, since the base of your mug is ready. Now we'll start experimenting with colors, shadows and highlights so it looks more realistic.
12. The first thing you must decide is the position of the light source. Let's say it comes from your left. Our mug will have a darker right, a lighter center and some highlights.
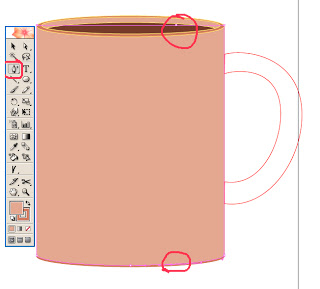
13. Copy the front part of the mug, paste it on a new layer and change its' color to a brighter one. Choose both layers and alight the elements to Left. Now add some anchor points as shown on the image using a pen tool. Delete the sidle points (as shown). To make your work easier, keep all inactive layers locked and open them only when needed.
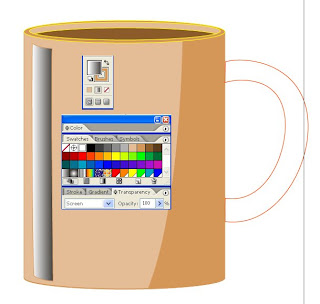
14. Now for the highlights. Using a Pen tool create a narrow rectangle form. Adjust handles. When finish adjusting, fill it with black and white Gradient. Go to Transparency menu and change it to Screen.
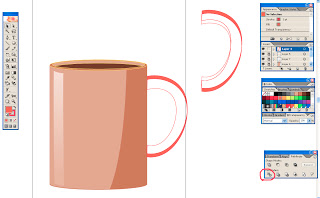
15. Choose the Handle and copy it twice (Choose + Alt + drag). Alight objects to left. Go to Pathfinder, Divide and Ungroup (right click) them. Choose colored sections (see image) and place them as shown.
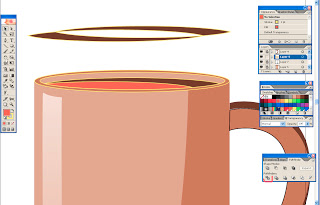
16. Remember we worked on a drink part? Let's finish that. Copy the smaller ellipse. Copy it again and place as shown. Go to Pathfinder - Divide – Ungroup. Put a light color on the middle section and place it as shown. If you wish, you can repeat this step again, to imitate liquid waves.
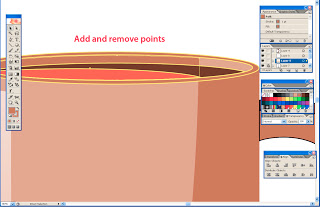
17. Copy the big inner ellipse one last time. With a Pen tool add and remove some points to and from it. Adjust handles as shown.
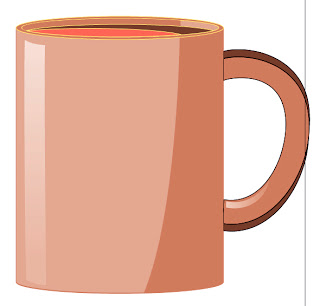
18. Create a highlight for the handle like you created a mug highlight.
19. Now let's work the color. Unlock all layers so we could apply it. I used 39, 18, 97 for the lighter part of the mug, 40, 45, 91 for the darker part, 31, 70, 54 and 29, 58, 83 for coffee, 33, 53, 74 for dark parts of the handle. Apply Black for strokes, all but the highlights.
Lock all layers.
Delete all the unnecessary details around the mug.
And now for the final touch – The steam and coffee beans.
20. On a new layer set Fill color to none. Use a Pen tool to create wavy coffee steam. Adjust handles if needed. Create three lines, apply a darker color, and then duplicate it (Choose- Alt+drag).
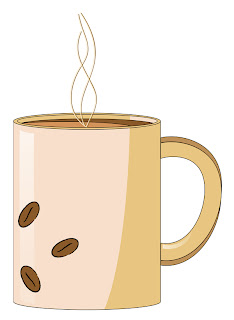
21. For coffee beans create a small ellipse and put a wavy line inside using a Pen tool. Make the bean dark brown and the strokes – black. Go to Brushes and choose a Charcoal – Thin 1 brush to make the bean more decorative. Duplicate the bean several times and spread them on the mug. Remember to place this layer behind the mugs white highlight.
This is it.
Hope you enjoyed this tutorial.
If you have any question regarding this tutorial, don't hesitate to ask.
Enjoy your coffee... :)
No comments:
Post a Comment