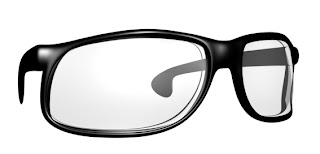
Summer is here, so it's time to model some glasses!!! These are actually regular ones but with some material adaptation you can use the same tutorial to create some sunglasses too.
So...
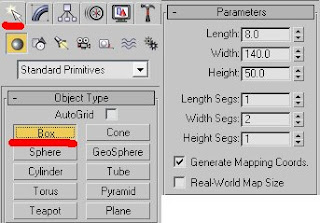
1. On a top view create a box measured 8-140-50 with 2 Width segments.
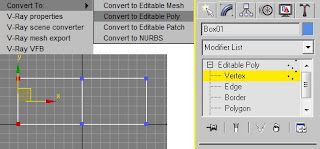
2. Right click the object to convert it to Editable Poly. Go to a modifier panel and choose Vertex sub-object and delete a left part of the box.
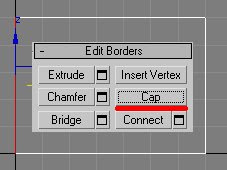
3. Now if you look at the Perspective view you’ll notice that deleted Vertexes created a hole in our box. To fix it we should choose an open Border and Cap it.
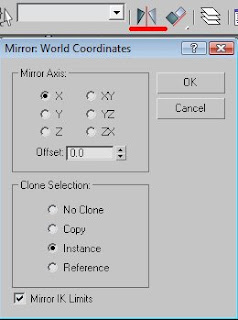
4. Mirror – Instance this box and Move it aside. This way, while working on one part only, we’ll be seeing a progress on both parts. We will connect them later.
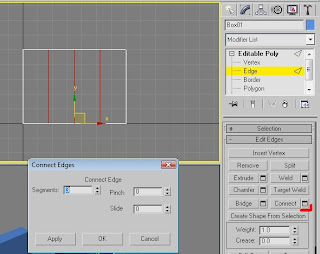
5. Connect opposite splines 3 times and other opposites twice.
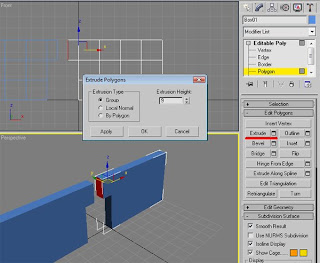
6. Choose the shown polygon and extrude it outside. It will be the bridge holder (the nose part).
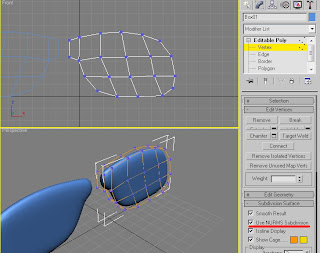
7. Start moving the vertexes on a Front view to give it a basic glasses frame shape. Use reference image or your own sunglasses for that matter. When finished, go to a Modifier panel - Subdivision Surface and check Use NURBs with Iterations 2 and uncheck afterwards.
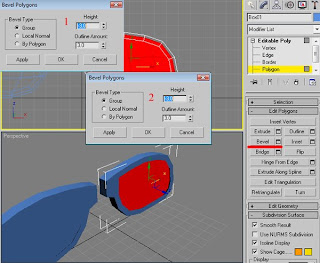
8. Choose central Polygons and Bevel them inside twice – first for the (0;-4) and second for the lens (-3;3). Do the same with the back side of the glasses. Check and uncheck NURMS sbdv for a quick check. If you wish to make some changes – to make a lens thicker or thinner, or to change the shape of your glasses – just keep moving the Vertexes. Just do it now, while we’re at the beginning.
9. To create nose part choose one half and convert it to Editable poly again.

10. Before creating an Earpiece take another look at it. You’ll notice that it is not totally straight, but a bit curved. Choose an upper side polygon and Extrude it a bit - twice. If it goes up or down – fix it by moving Vertexes.

Now from the back of the second part – One long extrude and two small ones. Move and Rotate it Vertexes to give it a curved shape Connect central Edges, if needed. Check and uncheck NURMS subdvs again.
11. Time to connect the two parts together.
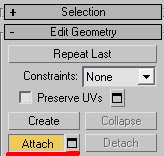
12. Choose both parts and convert them to Editable Poly again (right-click). Choose one part and Attach it another part. Now the two glasses halves are chosen.
13. Remember the nose bridge? Choose both polygons as shown (Choose – Ctrl - choose) and press Bridge.
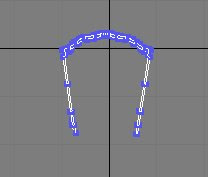
Now we have one solid pair of glasses. Make adjustments if needed – by connecting Edges and moving Vertexes.
14. Since glasses are usually concaved, move and rotate your vertexes so it fits the shape of the head.
15. Now we'll start adding materials. Since its one single object we'll obviously use a multi/sub-object color.
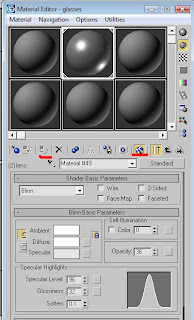
16. Press M for material editor. Change Standard to Multi/Sub-object and Set the material number to 2. Name them Frame and Lens. For a frame I used Black for Ambient color with a Specular level of 107 and Glossiness of 26 – ID 1.
17. For a lens I used White for Ambient, 96 for Specular level and 32 for Glossiness – ID 2.
18. Choose your object and Assign materials it and make them Visible in Viewports.
19. While glasses are still chosen, press Element in a modifier panel and choose glasses again. You will see that all polygons have been chosen.
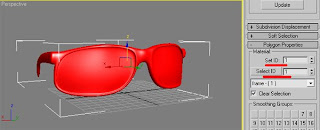
20. Scroll down to Polygon Properties and set ID color to 1. That will color our glasses to black.
21. Choose lens polygons – front and back – and set their ID to 2.
22. If you haven’t done it yet, check NURMS Subdvs to make the glasses smooth.

23. Hit 8 to change the background to white and F9 to render.
24. That’s it. The glasses are ready.
25. If you have any questions regarding this tutorial - don’t hesitate to ask me.
2 comments:
Good Tutorial, and a very quick method you have given.
Thanks, n looking forward for some more good stuff !!
SNEHA.
thanks for the tutorial!
Please make a portfolio at
http://www.yr3d.com
Post a Comment