Making of a Heart
1. Create a box in a Top View.
2. Go to Modify panel and change its parameters to:
L 30; W 65; H 80;
L Seg. 2, W Seg.2, H Seg 3.
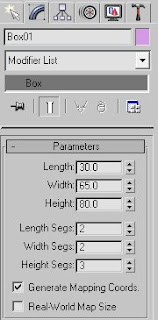
3. Convert (right click) to Editable Poly.
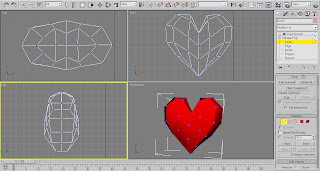
4. Start moving the Vertexes until you create a Heart-like shape that would look something like this.
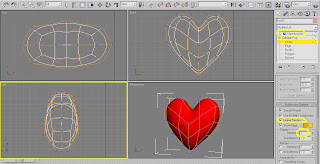
5. While the Vertexes are still chosen, go to Subdv. Surface list and check Use NURMS Sbdv: Display - Iterations : 2.
The Heart model will immediately become much smoother than before.
6. For Extra smoothness you can choose a MeshSmooth Modifier and set it to - Iterations : 2.
And now for the Material part.
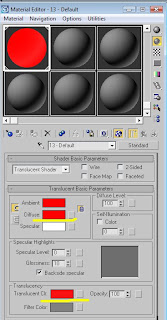
7. Press M on your keyboard and choose an empty slot.
8. Choose a Translucent Shader. Choose Red (255, 0, 0) for Diffuse and another Red (248, 18, 18) in Translucent clr.
Leave the other parameters as they are.
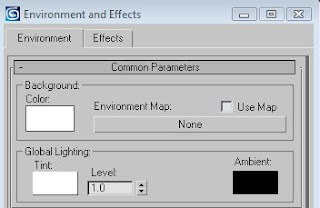
9. Press 8 to change the Environment background for White.
10. Press F9 to render.

That’s it. Hope you enjoyed it.
4 comments:
thanks dalia...
i cant bring the perfect shape with this can u pls help me..?
my e mail id; rm.sathis@yahoo.com
To create a perfect/equal shape you shoud either work with both sides simultaneously (also use rulers) or create only a half shape and then Mirror-Instance the other side.
I hope it helped.
To create a perfect/equal shape you shoud ... Just setup a grid and snap points to it :P Grids ensure hints for perfectness.
Post a Comment